Disclosure: We may earn a commission when you buy through links on this page, at no extra cost to you. We buy nothing, sell nothing and accept no payment for coverage — commissions never decide what we recommend. How we make money.
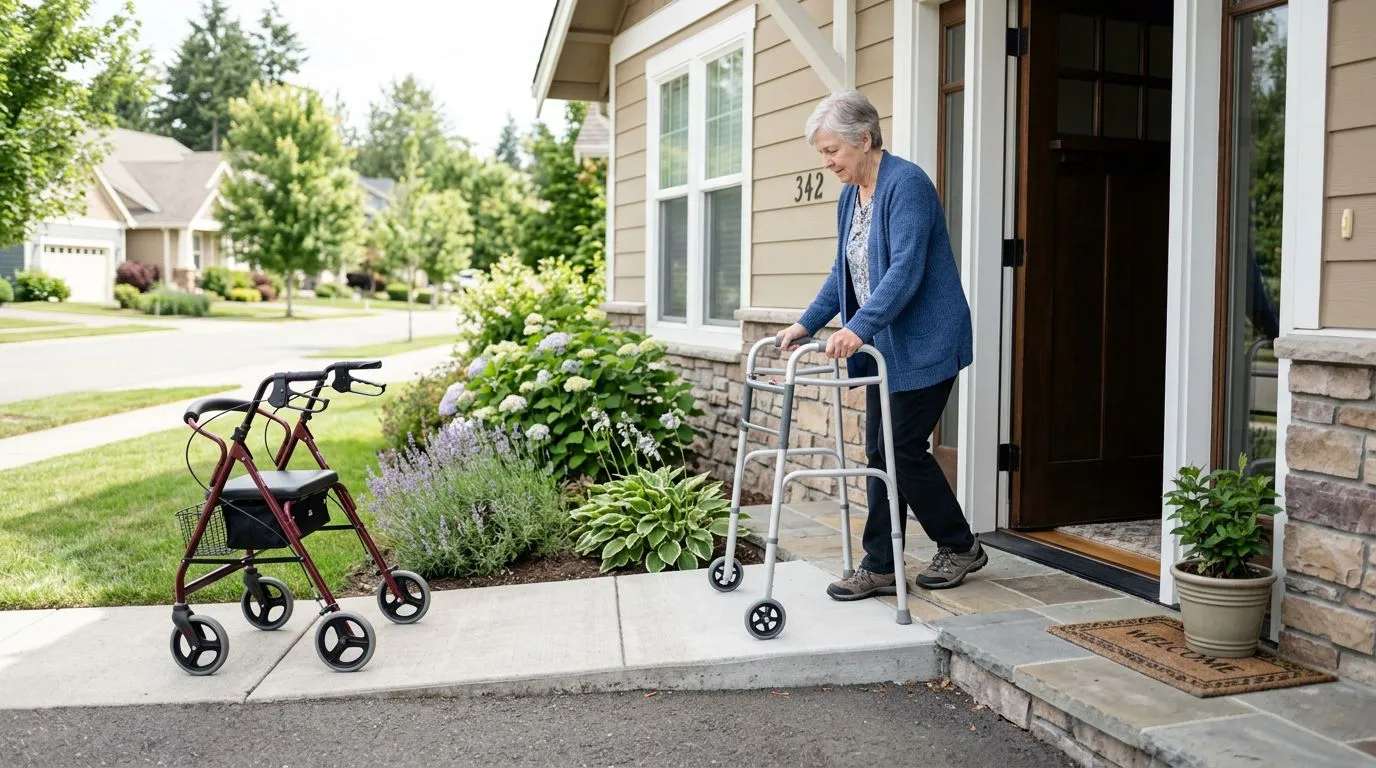
The safest way to handle curbs, ramps, and thresholds is to slow down, face the obstacle straight on, and use the right technique for your mobility aid. A no-wheel walker, two-wheel walker, and rollator behave differently, especially at a 1-inch threshold or a 6-inch curb. When you are unsure, choose the ramp or curb cut, ask for help, or practice with a physical or occupational therapist before trying it alone.
Walkers are designed to provide stable support with a fixed frame. Rollators are wheeled walking aids with hand brakes and usually a built-in seat. That difference matters outdoors. A standard walker can be placed deliberately on each surface, but it has to be lifted. A rollator moves more easily, but it can also roll away if the brakes are not controlled.
Why 1 inch can change walker and rollator safety
A height change as small as 1/2 inch can catch a walker tip, a rear glide, or a rollator wheel. Many entry thresholds are between 1/2 inch and 2 inches high, while a typical street curb is close to 6 inches. Those numbers are enough to change your plan.
The core safety idea is simple: keep the device close, make sure all tips or wheels are stable before you step, and avoid leaning far forward. With a walker, you usually move the frame first and then step into it. With a rollator, you control the wheels and brakes while keeping the frame from getting too far ahead.
Curbs, ramps, and thresholds also create different risks. Curbs involve a sudden height change. Ramps add speed, especially going down. Thresholds are small enough to seem harmless, which is why people often rush them. That is when a front wheel stops, the body keeps moving, and balance is lost.
The 10-second setup check before any curb, ramp, or doorway
Before approaching a curb, ramp, or threshold, pause for about 10 seconds and look at the surface. This quick check can help you avoid stepping into a loose mat, wet ramp, broken pavement, or raised door sill.
- Look for height. Estimate whether the obstacle is under 1 inch, 1 to 2 inches, or curb height.
- Check traction. Wet leaves, gravel, ice, and polished concrete can reduce grip.
- Square up. Approach straight on whenever possible, not at a sharp angle.
- Clear clutter. Watch for cords, door mats, bags, pet bowls, and uneven pavers.
- Use shoes with grip. Avoid loose slippers at entryways.
- Keep both hands available. Carrying a bag in one hand changes how the walker or rollator moves.
For rollators, add one more step: test the brakes before you need them. Squeeze both hand brakes and make sure they slow the wheels evenly. If the rollator has parking brakes, use them for standing still or sitting, not for sliding down a ramp.
Curbs: 2 safe patterns for no-wheel and two-wheel walkers
A street curb is often around 6 inches high, which is much more demanding than a doorway threshold. If there is a curb cut within a few steps, use it. If you have been trained to use a curb with a walker, move slowly and keep the walker close enough that you do not have to reach.
No-wheel walker on a curb
A no-wheel walker, often called a standard walker, is stable because all 4 legs contact the ground. The tradeoff is that you must lift the entire frame. To go up a curb, stand close to it, place the walker fully on top with all 4 tips flat, then step up into the walker. Many people are taught to step up with the stronger leg first, followed by the weaker or more painful leg, but follow your clinician’s instructions if you have been given a different sequence.
To go down, place the walker on the lower surface first. Make sure all 4 tips are firmly down before moving your feet. Step down carefully, often with the weaker leg first, then bring the stronger leg down. Keep your weight centered; do not push the walker too far ahead.
Two-wheel walker on a curb
A two-wheel walker has front wheels and back legs or tips. The front wheels make it easier to move on level ground, but the rear legs still need solid contact for stability. Going up, bring the walker close, lift or guide the front wheels onto the curb, then place the rear tips firmly on the upper surface before stepping. Going down, place the front wheels and rear tips on the lower surface in a controlled way before stepping down.
Do not let the front wheels roll forward while your feet are still on the lower level. If the rear tips catch on the edge, stop and reset. A second person standing nearby can be helpful during practice, especially on a full-height curb.
Rollators on curbs: use brakes and prefer the curb cut
Most rollators have 3 or 4 wheels, hand brakes, and a seat, but they are not the same as a standard walker. A rollator is easier to push outdoors, yet it is less stable if you lean hard on it. On a 6-inch curb, the safest choice is usually the curb cut or ramp, not lifting the rollator while stepping.
For a small curb lip or shallow entry edge, approach straight on and slow down before the front wheels reach the height change. Keep both hands on the handles. Use light brake pressure to prevent the rollator from surging forward, then guide the front wheels over the edge. Pause, keep the frame close, and bring the rear wheels over.
Going down a curb or lip is where many rollator falls happen. Avoid pushing the rollator off the edge and then stepping after it from a distance. The frame can drop away and pull your body forward. Instead, use a curb cut when available. If there is no curb cut and the drop is more than a small lip, ask for assistance or use another route.
Upright or stand-up rollators require the same caution. Their taller forearm supports can feel secure, but they still roll. Keep your forearms and hands engaged, use both brakes, and avoid twisting the frame at an angle on the curb edge. Bariatric rollators may have wider frames and higher weight capacities, but extra frame width can make tight curb cuts and narrow entries harder to navigate.
Ramps: the 1:12 slope rule and controlled speed
A common accessibility guideline is a 1:12 ramp slope, meaning about 1 inch of rise for every 12 inches of ramp length. Even on a properly built ramp, gravity changes how walkers and rollators behave. The longer the ramp, the more important pacing becomes.
Using a no-wheel walker on a ramp
With a no-wheel walker, place the walker a short distance ahead, set all 4 tips down, then step forward. Use smaller steps than you would on flat ground. Going uphill, avoid placing the walker too far ahead because that can make you lean forward. Going downhill, keep the walker close and fully planted before each step.
Using a two-wheel walker on a ramp
With a two-wheel walker, the front wheels help the frame move, but the rear tips add braking-like resistance. On an uphill ramp, roll the front wheels a short distance and keep the rear tips controlled. On a downhill ramp, do not let the walker coast. Keep your steps short, your body inside the walker frame, and the rear tips in contact with the ramp as much as possible.
Using a rollator on a ramp
A rollator can gain speed quickly on a ramp. Keep both hands on the brakes and use gentle, even pressure while descending. Do not squeeze one brake much harder than the other unless you are intentionally turning, because uneven braking can cause the rollator to veer.
When going uphill, stay close to the rollator and take steady steps. If you need to rest, move to a flat landing if possible. Do not sit on the rollator seat while parked on a ramp. Parking brakes are designed to hold the rollator still on appropriate surfaces, but a slope adds risk, especially if the surface is wet or uneven.
| Device type | Uphill ramp | Downhill ramp | Main risk |
|---|---|---|---|
| No-wheel walker | Lift and place all 4 tips | Keep frame close and planted | Reaching too far forward |
| Two-wheel walker | Roll a short distance, then step | Control rear tips and speed | Front wheels moving too fast |
| 3-wheel rollator | Keep centered; avoid sharp turns | Use both hand brakes lightly | Narrow base and quick turning |
| 4-wheel rollator | Stay close; use steady pace | Brake evenly with both hands | Coasting ahead of the user |
Thresholds from 1/2 inch to 2 inches: entryway technique
Doorway thresholds are often between 1/2 inch and 2 inches. That is small enough to overlook, but high enough to stop a wheel or walker tip. Entryways also combine several tasks at once: opening a door, stepping over a raised strip, and managing a device in a narrow space.
For a no-wheel walker, square up to the threshold and lift the full frame over it. Set all 4 tips down on the far side before stepping. If the threshold is wide, move one foot at a time and avoid standing with one foot inside and one foot outside longer than necessary.
For a two-wheel walker, guide the front wheels over first, then make sure the rear tips clear the threshold instead of dragging against it. If a rear tip catches, stop. Do not yank the walker forward while your feet are moving. Reset the frame and try again more slowly.
For a rollator, keep the device close and use the brakes to control speed. Roll the front wheels over, pause, then bring the rear wheels over. Larger wheels usually handle small thresholds better than small wheels, but no wheel is immune to catching if you approach at an angle.
At home, remove loose throw rugs near the doorway. If a threshold is a daily problem, a properly installed threshold ramp may help, but it must match the height and doorway width. A ramp that is too steep, too narrow, or unsecured can create a new hazard.
Who each technique is best for: 3 common mobility situations
The right approach depends on the device, the person’s balance, and the environment. A person who can safely lift a 6- to 8-pound walker may use a standard walker well at a curb, while another person may do better with a rollator on long, level outdoor paths but need help at high curbs.
| Situation | Often better fit | Why it may help | Extra caution |
|---|---|---|---|
| Needs firm support with every step | No-wheel walker | All 4 tips can be planted before stepping | Requires lifting the frame repeatedly |
| Can walk steadily but tires on flat ground | Two-wheel walker or 4-wheel rollator | Less lifting; smoother outdoor movement | Wheels need speed control |
| Needs a seat for rest breaks | Rollator with hand brakes and seat | Built-in seat can help during planned stops | Seat should be used only with brakes locked on level ground |
| Very narrow entries or tight turns | Standard or two-wheel walker, sometimes 3-wheel rollator | Smaller footprint may fit better | 3-wheel rollators usually do not offer the same seated rest option as 4-wheel models |
| Higher body weight or wider stance | Bariatric walker or bariatric rollator | Higher weight capacity and wider frame options | Measure doorways and ramp width before relying on it outdoors |
Walkers and rollators should be chosen for the setting, not just the store aisle. A device that feels easy on smooth indoor flooring may behave very differently on gravel, a sloped driveway, or a metal doorway threshold.
How to measure fit and practice in 15 minutes
A short, structured practice session can make outdoor movement safer. Plan about 15 minutes in a quiet area with another adult nearby, especially when trying a new walker or rollator technique. Stop before fatigue changes your posture or judgment.
Start with handle height. When standing tall in your usual shoes, the handgrips are commonly set near the crease of the wrist, with elbows slightly bent, often around 15 to 30 degrees. If the handles are too low, you may lean forward. If they are too high, your shoulders may rise and your control may suffer.
Next, measure your common obstacles. Use a tape measure to check the front door threshold, garage entry, porch step, and curb near your driveway. Write down the heights. A 3/4-inch threshold may call for a different approach than a 2-inch lip or a 6-inch curb.
Practice in this order: first level walking for 3 to 5 minutes, then a low threshold, then a gentle ramp, and only then a curb if a clinician has said it is appropriate. For rollators, include brake practice on level ground: squeeze to slow, release smoothly, and lock the parking brakes only when stopped.
- Practice when rested, not after a long outing.
- Use the shoes you wear outdoors.
- Keep pets and children away from the practice path.
- Try one new skill at a time.
- Stop if you feel rushed, dizzy, weak, or unsure.
9 things to avoid on curbs, ramps, and thresholds
Many falls happen because of small shortcuts. These 9 habits are worth avoiding with both walkers and rollators.
- Do not approach at a diagonal. Angles make tips and wheels catch more easily.
- Do not place the device too far ahead. Reaching shifts your weight forward.
- Do not carry items in your hands. Use a basket, pouch, or help from another person when appropriate.
- Do not use a rollator seat on a slope. Sit only when stopped, brakes locked, and the surface is level.
- Do not descend a ramp with loose brake control. Rollators can accelerate quickly.
- Do not yank a caught wheel or tip. Stop, rebalance, and reposition the device.
- Do not assume bigger wheels solve every problem. They may help outdoors, but technique still matters.
- Do not use worn rubber tips. Check walker tips regularly; replace them when tread is smooth or uneven.
- Do not ignore weather. Wet metal thresholds, icy curb cuts, and leaf-covered ramps can be slippery.
For rollators, brake maintenance is not optional. If one brake grips and the other does not, the rollator may pull to one side on a ramp. For walkers, inspect the frame and tips. A loose adjustment button, cracked tip, or bent leg can reduce stability.
When to get 1-on-1 training before trying a 6-inch curb
A full-height curb, often around 6 inches, is enough of a challenge that many people should practice with a physical therapist, occupational therapist, or trained mobility professional before doing it alone. This is especially true after surgery, a fall, a stroke, a new diagnosis affecting balance, or a recent change in strength.
Training is also wise if you use oxygen tubing, have low vision, experience dizziness, or need both hands for strong support. A professional can watch your exact sequence, adjust handle height, recommend a safer route, or suggest whether a different walker or rollator type would fit your daily environment better.
The goal is not to make every obstacle possible. The goal is to choose the safest option available: a ramp instead of a curb, a level entrance instead of a steep driveway, or assistance instead of forcing a risky step. Good mobility safety is practical, not prideful.
Outdoors and at entryways, slow is safe. Pause, square up, keep the walker or rollator close, and control the device before moving your feet. Those small habits can make curbs, ramps, and thresholds much more manageable.
FAQ
Frequently asked questions
Is a rollator safer than a walker on ramps? +
Not always. A rollator is easier to move on a ramp, but it can pick up speed downhill and requires good brake control. A walker may feel more stable for people who need firm support, but it takes more effort and careful placement.
Should I lift my rollator over a curb? +
In most cases, use a curb cut or ask for help instead of lifting a rollator over a full-height curb. Rollators are wheeled devices and can become unstable if lifted while you are leaning on them.
Which leg goes first when stepping up a curb with a walker? +
Many people are taught to step up with the stronger leg first and step down with the weaker leg first, after the walker is securely placed. Follow the specific instructions from your physical therapist or clinician if they differ.
How high can a doorway threshold be before it becomes a problem? +
Even a 1/2-inch threshold can catch a walker tip or small wheel. Thresholds around 1 to 2 inches deserve extra caution, a straight approach, and possibly a properly fitted threshold ramp.
Can I sit on my rollator seat on a ramp? +
No. Sit on a rollator only when it is on a level, stable surface with the parking brakes locked. A ramp adds slope and movement risk, even if the brakes seem engaged.
When should I ask for professional training? +
Ask for training if you have had a recent fall, surgery, dizziness, balance changes, low vision, or trouble managing a curb or ramp. A physical or occupational therapist can teach safer techniques for your exact device and environment.
Keep reading
Related guides

How to Use a Mobility Walker Safely: Step Pattern, Posture, Turning, and Trip Prevention
13 min read
Using a Mobility Walker Outdoors: Curbs, Ramps, Gravel, Grass, and Wet Surfaces
13 min read
Caregiver Training for Walker and Rollator Users: Assist Without Raising Fall Risk
12 min read