Disclosure: We may earn a commission when you buy through links on this page, at no extra cost to you. We buy nothing, sell nothing and accept no payment for coverage — commissions never decide what we recommend. How we make money.

After hip or knee surgery, the safest way to walk with a walker is usually a step-to gait: move the walker forward first, step with the surgical leg, then bring the stronger leg up to meet it. Your exact pattern depends on your surgeon’s or physical therapist’s weight-bearing order, which may range from no weight to full weight as tolerated. A rollator is usually not the first choice right after surgery unless your care team specifically prescribes it, because its wheels, brakes, and turning style can be harder to control in early recovery.
This guide focuses on standard walkers, folding walkers, and two-wheel walkers commonly used after hip replacement, knee replacement, fracture repair, or similar lower-body procedures. It also explains where rollators fit, when they may be unsafe, and what to ask before switching from a walker to a wheeled rollator.
Walker vs. rollator after surgery: the 3 key differences
A walker and a rollator are not the same device, especially in the first days or weeks after hip or knee surgery. A standard walker has 4 legs and no wheels. A two-wheel walker has 2 front wheels and 2 rear legs or glides. A rollator has 3 or 4 wheels, hand brakes, and often a built-in seat.
That difference matters because early post-surgery walking is usually about control, weight management, and fall prevention. A no-wheel walker stops when you stop. A two-wheel walker rolls forward but still has rear contact points that slow movement. A 4-wheel rollator keeps rolling unless the brakes are used correctly, and many people instinctively pull back on it when they feel unsteady.
| Device type | Typical setup | Best early post-surgery use | Main caution |
|---|---|---|---|
| Standard walker | 4 legs, no wheels | Maximum stability for short indoor walks | Must be lifted with each step |
| Folding walker | 4 legs or 2 wheels, folds for storage | Home recovery and car transport | Check that folding locks are fully engaged |
| Two-wheel walker | 2 front wheels, 2 rear legs or glides | Common after hip or knee surgery when allowed | Can move too far ahead if pushed |
| 3-wheel rollator | 3 wheels, hand brakes, usually no full seat | Later recovery only if prescribed | Less stable side-to-side than 4-wheel designs |
| 4-wheel rollator | 4 wheels, brakes, seat | Community walking after clearance | Not designed to carry heavy body weight through the arms |
| Upright or bariatric rollator | Forearm supports or higher weight capacity | Specific long-term needs with professional fitting | May be too mobile for early surgical gait training |
The bottom line is simple: use the device your surgeon, hospital team, or physical therapist fitted for you. If you were discharged with a standard or two-wheel walker, do not substitute a rollator just because it has a seat. Brakes and a seat can help some people later, but they do not replace the stability of a correctly used walker during early recovery.
Know your weight-bearing rule before taking 1 step
Weight-bearing instructions tell you how much body weight you may place through the surgical leg. This is not guesswork. The difference between toe-touch weight bearing and weight bearing as tolerated can change how you move the walker, how far you step, and how much help you need.
Common orders include non-weight bearing, toe-touch or touch-down weight bearing, partial weight bearing, weight bearing as tolerated, and full weight bearing. Your paperwork may use abbreviations such as NWB, TTWB, PWB, WBAT, or FWB. If you are not sure what your order means, call your surgeon’s office or ask your physical therapist before practicing alone.
| Order | Plain-English meaning | Walker implication |
|---|---|---|
| Non-weight bearing | Do not put weight on the surgical leg | Walker supports your arms while the leg stays off the floor |
| Toe-touch or touch-down | Foot may touch for balance, with very little pressure | Think of resting the toes lightly, not stepping normally |
| Partial weight bearing | Only a limited amount of weight is allowed | Often requires close practice and clear instructions |
| Weight bearing as tolerated | Put weight through the leg as comfort and control allow | Step-to gait is still common at first |
| Full weight bearing | You may bear full weight if safe | Walker may still be used for balance and confidence |
Do not use pain alone as your rule. Some discomfort after surgery is expected, while sharp pain, sudden weakness, dizziness, or a change in incision drainage deserves medical attention. Your walker technique should match the written weight-bearing order, not what feels convenient in the moment.
Set the walker height in 2 quick checks
A walker that is too low makes you hunch. A walker that is too high makes it harder to use your arms well. A common starting point is to set the handgrips near the crease of your wrist when you stand tall with your arms relaxed at your sides.
The second check is elbow bend. When your hands are on the grips, your elbows should bend slightly, often around 15 to 30 degrees. You should not have to shrug your shoulders, lock your elbows hard, or lean your chest over the front bar.
Wear the shoes you plan to use at home when checking height. A 1-inch change in shoe sole thickness can affect posture and balance more than people expect. If your walker has push-button height adjustments, both sides must click into the same numbered hole before use.
- Stand inside the walker, not behind it.
- Keep the walker level, with all legs or wheels contacting the floor as designed.
- Check rubber tips for wear if you use a no-wheel walker.
- Confirm front wheels turn and roll smoothly on a two-wheel walker.
- Make sure folding mechanisms are locked before every walking session.
For taller users, shorter users, or bariatric users, the right fit may require a different walker size rather than simply adjusting the legs. Many standard adult walkers list height and weight capacity ranges, but the real test is whether you can stand upright, grip comfortably, and follow your weight-bearing rule without strain.
Step-to gait in 3 movements: walker, surgical leg, strong leg
Step-to gait is the classic early recovery pattern because it keeps each movement small and predictable. The sequence is: walker forward, surgical leg forward, stronger leg up to meet it. Many therapists teach the phrase, “walker, bad leg, good leg,” though some people prefer “walker, surgical leg, strong leg.”
Start with the walker close enough that your toes are near the back legs or rear tips. Move the walker forward a short distance, often about 6 to 12 inches. Place it down fully before stepping. If it is a no-wheel walker, lift and set it down rather than sliding it. If it is a two-wheel walker, roll it forward with control and avoid pushing it beyond your comfortable reach.
Next, step with the surgical leg. Keep the step small. Your foot should land between the back legs of the walker, not past the front crossbar. Then press through your hands as instructed and bring the stronger leg forward to meet the surgical leg. That completes 1 cycle.
Practice rhythm without rushing
Most people do better with a slow count: 1 move the walker, 2 step the surgical leg, 3 bring the strong leg forward. Short steps are not a failure. They are often the safest way to rebuild a smooth gait after anesthesia, swelling, pain medication, and several days of reduced activity.
Keep your eyes several feet ahead, not straight down the whole time. Glance down when needed to check foot placement, then look back up. If you feel lightheaded, stop, stand still inside the walker, and call for help if the feeling does not pass quickly.
Adjust the pattern for 5 common surgical instructions
Hip and knee surgeries do not all have the same restrictions. A total knee replacement patient with weight bearing as tolerated may walk differently from a hip fracture repair patient who has partial weight-bearing limits. Your therapist’s instructions outrank any general article.
These examples show how the walker pattern may change.
| Situation | Common walking focus | Practical cue |
|---|---|---|
| Knee replacement with WBAT | Controlled weight through the surgical leg | Step to first, then progress only when cleared |
| Hip replacement with precautions | Avoid unsafe twisting or bending positions | Turn with small steps, not a pivot |
| Partial weight bearing | Limit pressure through the surgical leg | Use arms more, step smaller |
| Non-weight bearing | Keep the surgical leg off the floor | Requires strong arms and close supervision at first |
| Significant swelling or fatigue | Prevent buckling or loss of balance | Shorten the walk and rest before form breaks down |
People recovering from knee surgery often focus on getting the knee to straighten during standing and land safely during stepping. People recovering from hip surgery often need extra reminders not to twist the surgical leg inward or pivot sharply. Those precautions vary by procedure and surgical approach, so follow the exact list you were given at discharge.
If a prescribed pattern feels impossible, do not improvise by switching devices or taking bigger steps. Ask for a review. A quick home health or outpatient therapy session can correct problems that might otherwise become unsafe habits.
Safe turns: use 4 to 8 small steps, not a pivot
Turning is where many post-surgery walker users get into trouble. The risky move is planting the feet and twisting the body around the surgical hip or knee. A safer turn uses several small steps while the walker stays close.
To turn, move the walker a few inches in the direction you want to go. Step the surgical leg, then the stronger leg, keeping your feet inside the frame. Repeat until you face the new direction. A 90-degree turn may take 4 to 8 small steps, especially early in recovery.
Do not swing the walker in a wide arc. Do not leave one foot behind and twist over it. If you are turning toward a chair, bed, or toilet, keep stepping until you can feel the surface lightly behind both legs before sitting, if that is part of your transfer training.
Turning with a two-wheel walker
With a two-wheel walker, keep the front wheels on the floor and lift or lighten the rear legs just enough to reposition. Move slowly. If the walker begins to roll away, stop and reset your stance before continuing.
Never pull yourself into a turn using a towel bar, door frame, rolling table, or walker tray. These objects can shift or fail. The walker should be your primary support unless your therapist has taught a specific transfer method using a fixed grab bar.
Who a standard, folding, or two-wheel walker is best for in the first 2 to 6 weeks
Many people use a walker for the first 2 to 6 weeks after hip or knee surgery, though the timeline can be shorter or longer. The right walker depends on strength, balance, weight-bearing status, home layout, and whether you can safely lift the frame.
A standard no-wheel walker is best for someone who needs the most stable base and can lift the walker without breaking precautions. It is often useful for very short indoor distances, such as bed to bathroom. The tradeoff is effort: lifting the walker with every step can tire the arms and shoulders.
A folding walker is best for home recovery when storage and transport matter. Many folding walkers fit more easily beside a bed, in a car trunk, or near a dining chair. The safety point is simple: it must lock open every time. A partially opened folding walker is not safe to use.
A two-wheel walker is best for many post-surgery users who need stability but do not want to lift the frame repeatedly. The front wheels reduce effort, while the rear legs or glides add some braking effect. It is commonly used after hip or knee surgery when the person can control speed and keep the walker close.
A rollator may be best later for someone who has endurance limits, needs a seat for planned rests, and can reliably use hand brakes. That does not make it ideal immediately after surgery. Rollators are designed for mobility support, not for strict unloading of a surgical leg unless a clinician says otherwise.
How to choose and measure a walker in 6 home checks
Choosing a walker after surgery is not only about body height. Doorways, flooring, turning space, and the frame’s weight capacity matter too. Many interior doorways are around 28 to 32 inches wide, and tight bathrooms can make a wide device difficult to manage.
Use these 6 checks before relying on a walker at home.
- Height fit: Handgrips should line up near the wrist crease with a slight elbow bend.
- Weight capacity: The listed capacity should meet or exceed the user’s body weight, with no guessing.
- Walker width: Measure narrow doors, bathroom entrances, and the path around the bed.
- Floor surface: Remove loose rugs and watch for thick carpet that catches rear tips or glides.
- Hand comfort: Grips should be easy to hold without numbness, slipping, or wrist pain.
- Foldability: If the walker folds, confirm you can open, lock, and close it without forcing the frame.
Bariatric walkers and bariatric rollators are available for higher weight capacities and wider frames, but larger equipment can be harder to maneuver in small rooms. Upright rollators place the forearms on supports and promote a taller posture for some users, yet they require careful fitting and are not a substitute for a post-operative walker unless prescribed.
If you are ordering or borrowing equipment before surgery, ask the surgical team what type they expect you to use. Bringing home the wrong device can delay safe walking practice right when you need confidence.
Stairs, curbs, and thresholds: practice the 1-step rule with help
Stairs and curbs require separate training because the walker pattern changes. Many people are taught the phrase “up with the good, down with the bad,” meaning the stronger leg leads going up and the surgical leg leads going down. This is a general cue, not a replacement for your therapist’s instructions.
For a single threshold or curb, do not rush. Stop close to the edge. Make sure the walker is stable on the new level before stepping. If the step is more than a few inches or you feel unsure, have a trained helper nearby. Early after surgery, even a 1-step entry can feel very different from a flat hallway.
On stairs, many walkers do not fit safely on each step. Your therapist may teach you to use a handrail and folded walker, or may recommend a different temporary setup. Never carry an open walker up a flight of stairs while also trying to bear weight through it unless that exact method has been taught and approved.
Thresholds inside the home matter too. A raised strip between rooms, a shower lip, or a thick rug edge can catch walker tips. Clear the walking path before you are tired, not after.
Common mistakes to avoid during the first 10 minutes of walking practice
The first 10 minutes of practice often reveal the habits that need correction. Slow down and watch for small errors before they become a fall risk.
- Pushing the walker too far ahead: Keep it close enough that you do not lean forward to reach the grips.
- Stepping past the front bar: Your feet should stay inside the walker frame during early gait training.
- Twisting during turns: Use small steps instead of pivoting on the surgical leg.
- Pulling up from the walker to stand: Most people are taught to push from the chair or bed, then reach for the walker.
- Walking when dizzy: Sit down safely and call for help if lightheadedness, nausea, or weakness appears.
- Using a rollator without clearance: Wheels and brakes add demands that may not fit early restrictions.
Fatigue changes form. A walk that starts well can become unsafe when your arms tire, your knee swells, or pain medication makes you drowsy. Plan shorter walks more often if that is what your care team recommends. Quality matters more than distance.
When to ask your therapist before switching to a rollator after 2 or more follow-up visits
A rollator can be useful later in recovery for people who need a seat, walk longer distances, and have good brake control. But it should be a planned transition, not a shortcut. Ask your therapist before switching, especially if you still have weight-bearing limits, balance loss, dizziness, or trouble turning.
A 3-wheel rollator is usually lighter and turns tightly, but it may feel less stable side-to-side. A 4-wheel rollator usually offers a seat and broader base, but it can roll away if the brakes are not set. Upright rollators and bariatric rollators solve specific posture or capacity needs, yet they also require correct sizing and enough space to maneuver.
Before a rollator is considered, you should be able to stand upright, control your walking speed, turn without twisting, and use both hand brakes consistently. You should also know when to lock the brakes before sitting. Sitting on an unlocked rollator seat is a common and preventable hazard.
The best mobility device is the one that matches your current stage of healing. Right after hip or knee surgery, that is often a standard, folding, or two-wheel walker. Later, it may be a cane, rollator, or no device at all, depending on your recovery and professional guidance.
FAQ
Frequently asked questions
Which leg moves first when using a walker after hip or knee surgery? +
In a common step-to pattern, you move the walker first, then the surgical leg, then bring the stronger leg forward to meet it. Follow your therapist’s instructions if your weight-bearing order requires a different pattern.
Can I use a rollator instead of a walker after surgery? +
Do not switch to a rollator unless your surgeon or physical therapist clears it. Rollators have wheels and hand brakes, which can be harder to control when you still need strict weight-bearing support or slow, steady steps.
How high should my walker handles be? +
A common fit check is to stand tall with your arms relaxed and set the handles near the crease of your wrists. When holding the grips, your elbows should have a slight bend, often about 15 to 30 degrees.
How far should I move the walker each step? +
Move it only a short distance, often about 6 to 12 inches, or the distance your therapist recommends. If the walker is too far ahead, you may lean forward and lose stability.
Is a standard walker or two-wheel walker better after knee replacement? +
Many people use a two-wheel walker after knee replacement because it is stable but does not need to be lifted each step. A standard walker may be preferred when maximum stability is needed. Your therapist should match the walker to your strength, balance, and weight-bearing status.
Keep reading
Related guides

Walker vs Rollator After Surgery or a Fall: Which Mobility Aid Fits Your Recovery Needs?
13 min read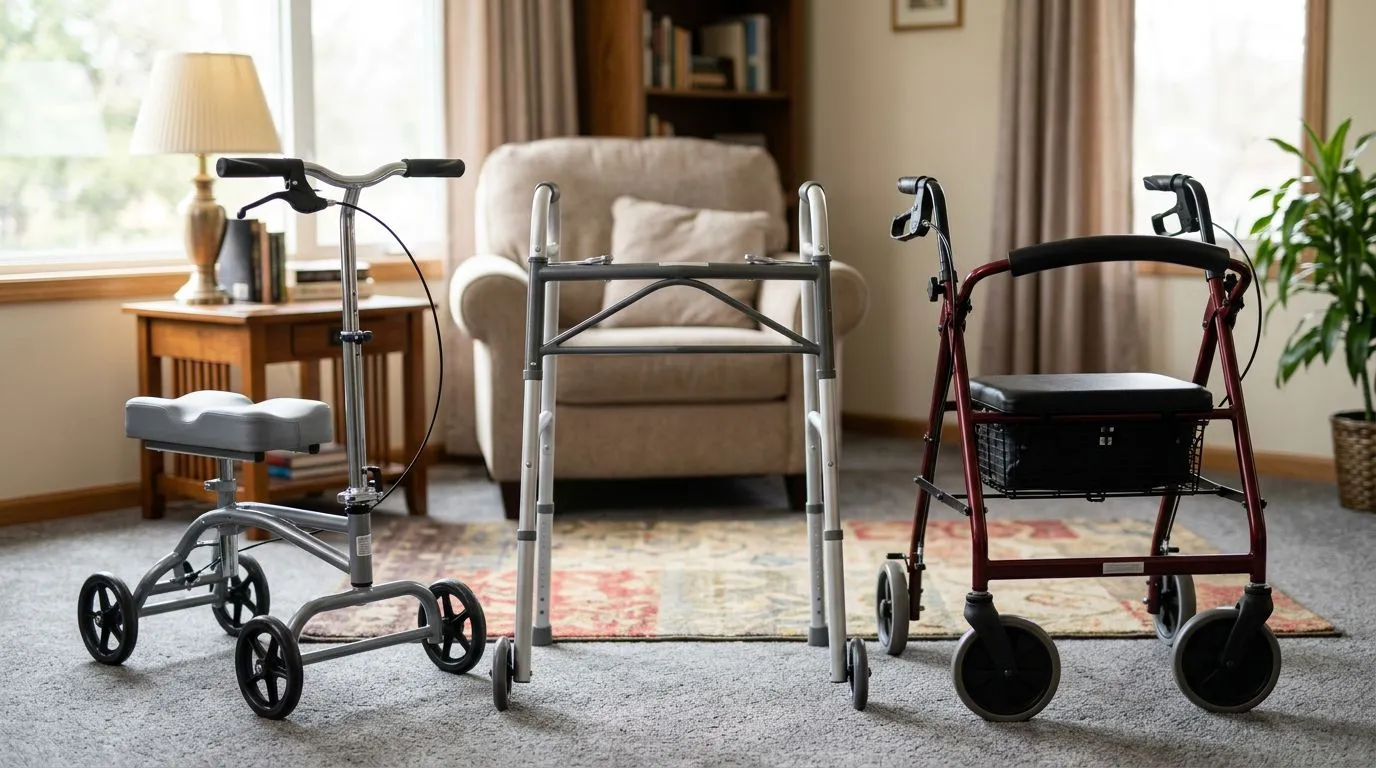
Knee Walker vs Rollator vs Standard Walker: Which Mobility Aid Fits Injury Recovery or Long-Term Use?
15 min read
How to Use a Mobility Walker Safely: Step Pattern, Posture, Turning, and Trip Prevention
13 min read