Disclosure: We may earn a commission when you buy through links on this page, at no extra cost to you. We buy nothing, sell nothing and accept no payment for coverage — commissions never decide what we recommend. How we make money.
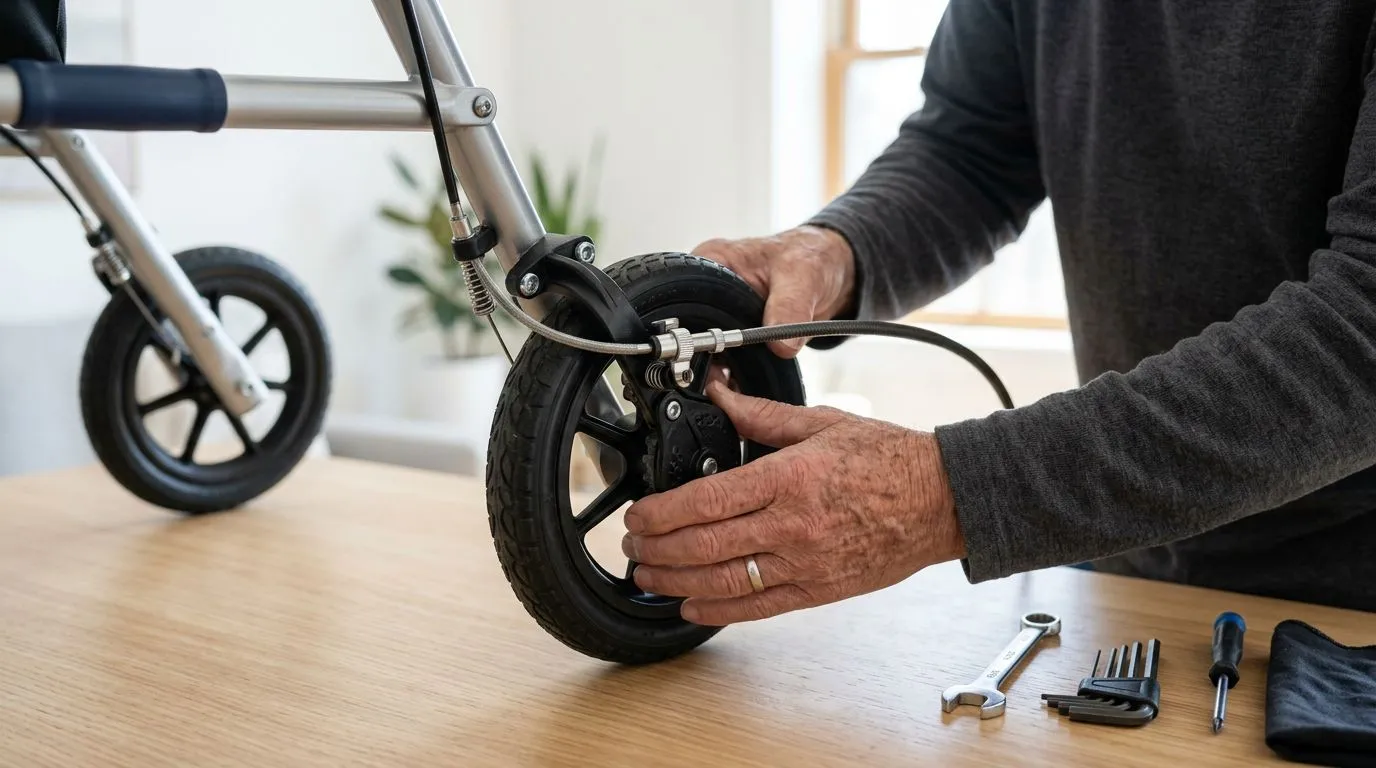
If a rollator brake cable is frayed, kinked, loose, or no longer lets the brake hold both wheels securely, stop using the rollator until the brake is adjusted or repaired. Most rollator brake problems come down to cable tension, worn brake pads, damaged cable housing, or incompatible replacement parts. Before buying parts, measure the cable, identify the brake style, and decide whether the repair is safe for you to handle or should be done by a mobility equipment technician.
Rollator brakes are safety-critical. A rollator is designed to roll, steer, slow down, and lock in place when someone sits, so the brake system needs to work every time. This guide explains the common parts, what can go wrong, how to measure for replacements, and when repair is not worth the risk.
Rollator brake cables in 30 seconds: what they do
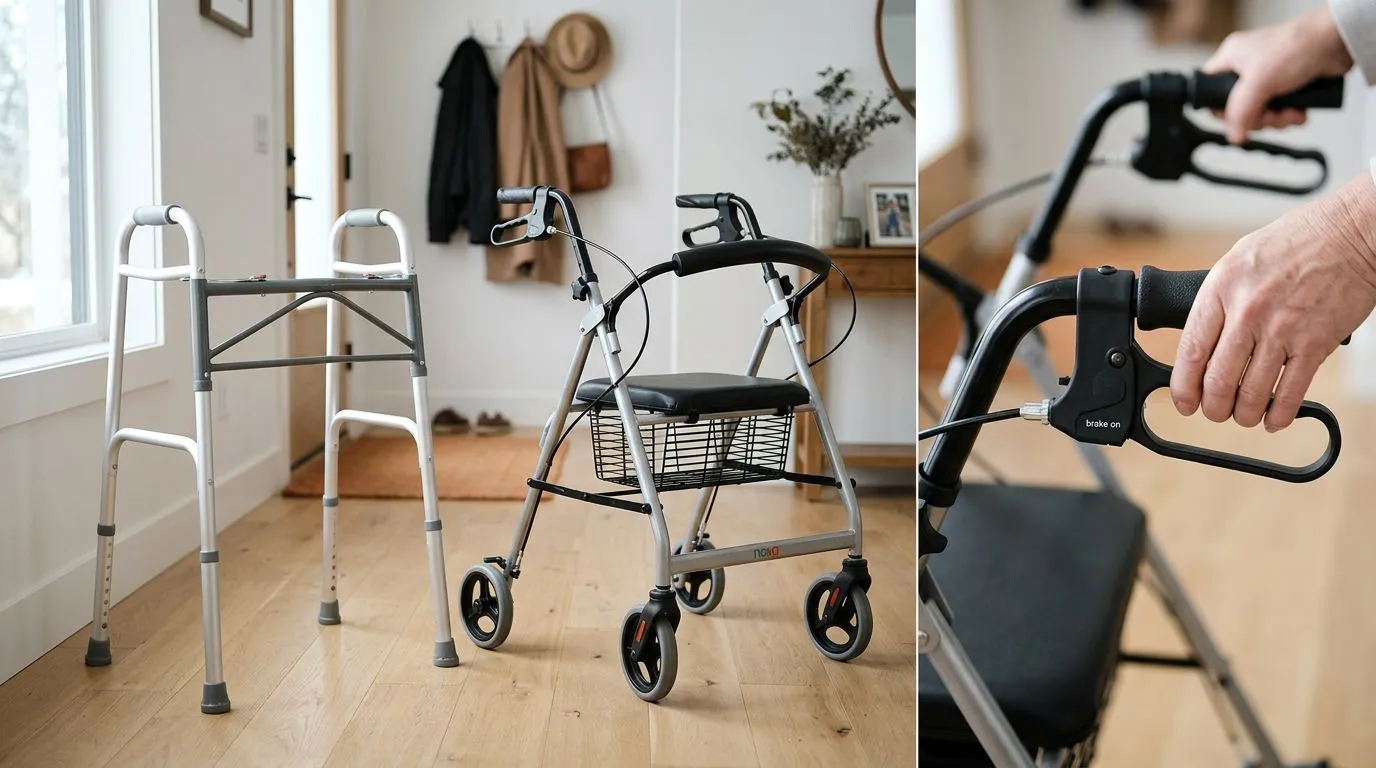
A rollator brake cable connects the hand brake lever to the brake mechanism near the wheel. When you squeeze the lever, the cable tightens and pulls the brake shoe or brake arm against the wheel. When you push the lever down, many rollators lock the brake for sitting or parking.
Most 4-wheel rollators and many 3-wheel rollators use a cable-operated loop-lock brake system. The cable usually has a thin inner metal wire running through an outer protective housing. The system may look simple, but small changes matter: a cable that is just 1/4 inch too loose can make the brake feel soft, while a frayed cable can fail suddenly under tension.
Brake cables can also differ by side. A left-side cable and a right-side cable may have different lengths or routing paths, especially on upright rollators with taller handles. Bariatric rollators may use heavier-duty brake components, but the same basic safety rule applies: both brakes should engage evenly and lock securely before the seat is used.
Rollator brakes vs standard walkers: 2 different categories
Rollators and walkers are often searched for together, but their brake parts are very different. A standard walker, folding walker, or no-wheel walker frame typically has 4 legs and no hand brakes. A 2-wheel walker may have front wheels, but it usually relies on rear tips or glides instead of cable brakes. Rollators, by contrast, have 3 or 4 wheels, hand brakes, and usually a built-in seat.
| Mobility aid type | Typical wheels | Seat | Hand brake cables? | Best fit |
|---|---|---|---|---|
| Standard or folding walker | 0 wheels | No | No | Maximum stability at a slow pace |
| Two-wheel walker | 2 front wheels | No | Usually no | Users who need support but not a rolling seat |
| 3-wheel rollator | 3 wheels | Usually no full seat | Yes | Tight spaces and lighter rolling support |
| 4-wheel rollator | 4 wheels | Yes | Yes | Walking longer distances with a place to rest |
| Upright rollator | 4 wheels | Often yes | Yes | Users who need taller forearm-style support |
This distinction matters when you order parts. If you are repairing a rollator, you are usually looking for brake cables, brake handles, brake pads, cable housings, springs, or rear brake assemblies. If you are maintaining a standard walker, you are more likely replacing rubber tips, glides, wheels, or hand grips—not brake cables.
Common rollator brake parts: 6 pieces to identify before ordering
Before replacing anything, identify the exact part that is worn or damaged. Many brake problems look similar at first. For example, a brake that will not hold might be caused by a stretched cable, but it could also be caused by a worn brake pad or a wheel that is not aligned correctly.
- Inner brake cable: The metal wire that moves when you squeeze the hand brake. Look for fraying, broken strands, rust, or sharp bends.
- Outer cable housing: The coated sleeve around the cable. Cracks, crushed spots, or exposed metal can prevent smooth braking.
- Brake handle or lever: The hand control used to slow, stop, or lock the rollator. A loose pivot or cracked lever can make the brake unreliable.
- Barrel end or cable end fitting: The shaped end of the cable that sits inside the brake lever. Common shapes include small round or cylindrical ends, but they are not universal.
- Brake pad, shoe, or stopper: The part that presses against the wheel. If it is worn unevenly or hardened, adjustment alone may not fix the issue.
- Adjuster barrel and lock nut: A small threaded adjuster near the handle or wheel. Turning it can fine-tune brake tension, often by a few millimeters at a time.
Some rollators have exposed cables running along the frame, while others route the cables partly inside the tubing. Internal routing can look cleaner, but replacement may be harder. If you cannot see where the cable enters and exits the frame, take several photos before loosening anything.
Signs a brake cable needs attention after a 10-foot stop test
A simple 10-foot indoor test can reveal many problems. On a flat, dry surface, walk the rollator slowly, squeeze both brakes, and see whether it slows evenly without pulling to one side. Then lock both brakes and gently try to move the rollator forward; the rear wheels should resist movement.
Stop using the rollator until it is checked if you notice any of these warning signs:
- The brake lever touches the hand grip before the brake fully engages.
- One wheel locks while the other keeps rolling.
- The parking lock will not stay down or pops back up.
- The cable has broken strands, rust, or a sharp kink.
- The brake pad does not contact the wheel squarely.
- The rollator rolls while the user is sitting or preparing to sit.
- The brake feels sticky, delayed, or inconsistent.
Do not test brakes on a slope, wet floor, or driveway. A rollator brake is meant to help control movement and hold the rollator when parked, but it should not be treated like a bicycle or car brake. If the rollator is hard to control on ramps or hills, talk with a clinician or mobility professional about whether a different device or technique is safer.
How to choose and measure replacement brake cables in inches
The best replacement brake cable matches the rollator’s brake design, length, routing, and end fittings. A cable that is 2 inches too short may not reach the brake arm; one that is too long may create loops that catch on furniture, clothing, or the frame.
Measure the cable length
If the old cable is intact, remove it only after taking photos of the routing. Measure the full inner cable from end to end, then measure the outer housing separately. Use inches, and write down whether you measured the left or right side. On some rollators, the left cable may be several inches longer because it crosses the frame differently.
Match the end fittings
The cable end at the hand lever must sit securely in the lever pocket. The lower end must attach correctly to the brake arm, clamp, or pinch bolt. Do not assume all loop-lock brake cables are interchangeable. A cable with the wrong barrel shape can slip, bind, or fail to seat fully.
Check the housing diameter and adjusters
The outer housing must fit into the frame stops and adjuster barrels. If it is too thick, it may not seat; if it is too narrow, it may move under braking. Also check whether your rollator uses an adjuster at the handle, at the wheel, or both.
Consider rollator size and style
Upright rollators often need longer cables because the hand controls sit higher. Petite rollators may use shorter cable runs. Bariatric rollators can have wider frames and heavier brake hardware. Wheel size can also matter: an 8-inch wheel and a 10-inch wheel may position the brake arm differently, even if the frame looks similar.
| What to measure or match | Why it matters | Practical tip |
|---|---|---|
| Inner cable length | Controls reach from lever to brake | Measure end to end in inches |
| Outer housing length | Affects routing and tension | Measure each housing section separately if split |
| Lever-end fitting | Must seat in the hand brake | Compare shape before installing |
| Wheel-end attachment | Must clamp or hook securely | Check for a pinch bolt, hook, or brake arm slot |
| Left or right side | Cables may not be identical | Label parts before removal |
| Rollator style | Upright and bariatric frames may differ | Do not rely on appearance alone |
Repair or replace? A 5-point safety decision
Some brake issues are reasonable to adjust. Others require replacement parts or professional service. Use this 5-point check before deciding what to do.
- Adjust if the cable is intact but slightly loose. If the brake works but the lever travel is long, a small tension adjustment may restore proper feel.
- Replace the cable if it is frayed, rusty, kinked, or stretched. A damaged cable should not be trusted because metal strands can break under load.
- Replace the housing if it is cracked, crushed, or sticky. New inner cable inside damaged housing may still brake poorly.
- Replace brake pads or shoes if the cable moves correctly but the wheel does not hold. Worn pads can reduce grip even with good cable tension.
- Replace the full brake assembly or get service if parts are bent, missing, or mismatched. Bent brake arms and cracked levers are not simple cable adjustments.
Also think about the user’s daily routine. If the rollator is used outdoors, on ramps, or several hours a day, the margin for error is smaller. If the brake is only partly working, the safest answer is to stop using the rollator until it is fixed and tested.
Basic adjustment and replacement overview: plan for 20–45 minutes
A simple brake adjustment may take 5 to 10 minutes. Replacing a cable can take 20 to 45 minutes for someone comfortable with small hardware, and longer if the cable is internally routed or the parts are unfamiliar. Work slowly and keep the rollator on a flat surface.
This is a general overview, not a substitute for the instructions for your specific rollator.
- Take photos first. Photograph the hand lever, cable path, frame clips, lower brake arm, and adjuster positions.
- Check both sides before changing one side. Compare the working brake to the problem brake if only one side is affected.
- Release cable tension. Back off the adjuster and loosen the lower clamp if the design uses one.
- Remove the old cable and housing. Watch how the end fittings sit in the brake lever and wheel brake.
- Install the new cable without sharp bends. Avoid tight loops, pinches, and contact with folding joints.
- Set initial tension. The brake should engage before the lever touches the grip, but the wheel should still roll freely when the brake is released.
- Tighten lock nuts and clamps. Loose hardware can let the cable slip during use.
- Test both rolling and parking functions. Test on a flat floor before returning the rollator to normal use.
A common mistake is over-tightening. If the brake pad rubs constantly, the rollator may feel harder to push and the wheel or brake pad may wear faster. Another mistake is leaving too much slack, which can make the parking lock unreliable.
Who DIY brake repair is best for—and who should get help within 1 visit
DIY repair may be reasonable for someone who can safely handle small parts, follow photos, and test both brakes carefully before use. It is best suited to straightforward jobs, such as replacing an exposed cable with the same length and end fittings or making a minor tension adjustment.
Professional help is the better choice if the rollator user depends on the device for every transfer, if the brake parts are bent, if the cable runs inside the frame, or if the parking brake has failed while the user was sitting. A mobility equipment repair shop, durable medical equipment provider, or qualified technician can usually inspect the full brake system in 1 visit, depending on parts availability.
Caregivers should be especially cautious. A brake that feels “good enough” in the garage may not be safe when the user is tired, stepping through a doorway, or sitting on the rollator seat. If you are unsure, have it checked.
Feature comparison: 3-wheel, 4-wheel, upright, and bariatric rollator brake parts
Brake cable replacement is not identical across rollator types. The basic cable concept is similar, but frame width, handle height, wheel size, and routing can change what parts fit.
| Rollator type | Brake part considerations | Repair difficulty |
|---|---|---|
| 3-wheel rollator | Often lighter, tighter frame, may have shorter cable runs | Low to moderate |
| 4-wheel rollator | Common loop-lock brakes, rear wheel brake pads, left/right cables may differ | Low to moderate |
| Upright rollator | Taller handles may require longer cables and different routing | Moderate |
| Bariatric rollator | Wider frame and heavier-duty components; match weight-rated hardware | Moderate |
| Compact or petite rollator | Shorter handle height and frame may require shorter housings | Low to moderate |
If a replacement cable is sold as a general rollator brake cable, still verify the measurements. “Universal” does not always mean safe for every rollator. Compatibility depends on the whole brake path, not just the cable.
Care schedule: 5 minutes every month can prevent many brake problems
A quick monthly brake check helps catch problems before they become urgent. It takes about 5 minutes and does not require special tools for the inspection portion.
- Weekly if used daily outdoors: Squeeze both brakes and confirm equal resistance.
- Monthly for most users: Inspect cables for rust, fraying, cracked housing, and rubbing against the frame.
- Every 3 months: Check brake pad contact and make sure lock nuts are snug.
- After folding or transporting: Confirm cables were not pinched in the folding joint or car trunk.
- After any fall, curb impact, or hard bump: Recheck brake alignment before the next walk.
Keep the cable path clean and dry. Avoid spraying household lubricants onto brake pads or wheels because slick residue can reduce grip. If a cable feels sticky, inspect the housing and routing first rather than adding oil near braking surfaces.
FAQ: 5 common rollator brake cable questions
Can I use a bicycle brake cable on a rollator?
Sometimes a bicycle-style cable may look similar, but it is not automatically compatible. The length, barrel end, housing diameter, and wheel-end attachment must all match the rollator brake system. If any part does not seat correctly, use a rollator-compatible replacement or get professional help.
How tight should rollator brakes be?
The brake should engage before the lever touches the hand grip, and the wheel should spin freely when the brake is released. When locked, the rollator should resist movement on a flat floor. Both sides should feel similar.
Should I replace both brake cables at the same time?
If one cable failed from age, rust, or heavy use, replacing both can be sensible because the other side may be close behind. If one cable was damaged by a specific pinch or impact, you may only need one side, but inspect both carefully.
Why does my rollator still roll when the parking brake is locked?
Common causes include loose cable tension, worn brake pads, a stretched cable, a slipping clamp, or a bent brake arm. Do not sit on the rollator until the parking brake holds securely on a flat surface.
Are rollator brake parts universal?
Some parts are marketed as general replacements, but rollator brake parts are not truly universal. Cable length, end shape, brake handle design, frame routing, and wheel brake hardware all affect fit.
FAQ
Frequently asked questions
Should I replace both rollator brake cables at the same time? +
If one cable failed from age, rust, or heavy use, replacing both can be sensible. If damage was isolated to one side, inspect both sides before deciding.
Why does my rollator still move when the parking brake is locked? +
Common causes include loose cable tension, worn brake pads, a stretched cable, a slipping clamp, or a bent brake arm. Do not sit on the rollator until it holds securely.
Keep reading
Related guides

Rollator Brake Cable Problems: Signs Your Brakes Need Adjustment, Repair, or Replacement
13 min read
Why Your Rollator Brakes Still Slip After Adjustment
14 min read
Rollator Brake Safety Checklist: How to Stop, Lock, Test, and Avoid Brake-Related Falls
11 min read